Showing posts with label beauty post. Show all posts

Friday, March 11, 2016

Friday Beauty - Pretty in Pinks

It's been a while since I've blogged about anything beauty. To be perfectly honest, I haven't really done anything super beautiful around here lately. I rarely wear makeup anymore, I hardly get the chance to paint my nails, and I only wear lipstick when taking blog photos. I'm a fraud. A sham. But I've never claimed to be a beauty expert. I just simply blog about the things I've tried, dislike, and truly love.

So when I opened the recent Sandra Lee magazine, a magazine I purchase monthly, and saw their Blooming Beauty spread, I was inspired! It's all about pretty little pink cosmetics to try and I want to try them all! Then it got me thinking about the pinks that I use often in the spring and summer, so I created a little college of all things pink! Read on....


I love MAC lipsticks and one of my favorite spring colors is Girl About Town (upper left corner). It's actually the first bright pink I ever purchased and I never looked back! And if I'm wearing it on my lips, I should probably wear it on my nails! Girl About Town comes in a nail lacquer and I'm so excited!! But I'm loving Show Orchid (bottom right corner) that was featured in Sandra Lee. It verges on purple, but it's simply lovely! Lastly, I really want to try their Playland Casual Colour in Young At Heart. It's a lip and cheek color in one, which is definitely a must-have for your handbag cosmetics! Nothing like a multipurpose touch up in a cute little tub!

When I get to polish my nails, I gravitate toward pinks for spring. Essie is a go-to and Cascade Cool is new for spring (bottom left corner), one I love wearing for a subtle hint of color. For a big pop of color, I'm loving the new Love Sheen from their Silk Watercolors collection (upper right corner). 

I'm a huge Clinique fan. As you all know, I swear by their 3-Step cleansing program and I frequently wear their cosmetics. They now have a cheek contouring palette that I would love to play with. I'm not sure how to contour, so I'm thinking I need a tutorial, and I'm totally up for the challenge. And those cute little pods are dual-sided lip treats that have a sugar-smoothing scrub on one side and a tinted moisturizing balm on the other. And the Pink Framboise is gorgeous!

Actually, all these shades of pink are gorgeous and there is no way you won't be pretty in pink. Side note: Did you know that this year is the 30th anniversary of Pretty in Pink? One of the best 80s movies, in my opinion, and who didn't love Duckie Dale!?! 

Okay, I digress. Are any of these hues going to be on your spring and summer makeup radar? I know they are on mine! Seriously, I can't wait to test out some of these products and report back. It's a tough job, but someone's gotta do it right?

Happy Friday, Beauties!

Friday, August 21, 2015

Friday Beauty - Fall Makeup Transition

 Transition. It's a word we use in fashion when moving from summer to fall. When talking about transition, we generally talk about how to transition our wardrobe from one season to the other and how to utilize the contents in your closet to work both seasons to your advantage. Today, instead of talking about how to transition your wardrobe, I thought we would focus on how to transition your makeup.

For summer, I add brighter colors to my lips and nails. And, I go one step further and brighten up my eyes as well. I tend to go with pale purples, creams, and taupes so that my overall look is lighter. But when fall rolls around, it's out with the pinks and in with the reds and bourdeauxs.

So what should one do when it's mid August and your starting to mix olives and navys into your daily look? It's time to start wearing richer tones. You don't have to throw out the pinks or reds. Actually, one should NEVER throw out red. Instead, reach for a pink in a more raspberry tone and reds that move toward maroons. 

 Below are my picks from my own makeup bag! Take a peek.


Laura Geller Beauty Color Drenched Lip Gloss in Raspberry Roast/MAC Ruby Woo/
NARS Shanghai Express/MAC Kissable Lipcolor in Flaunting


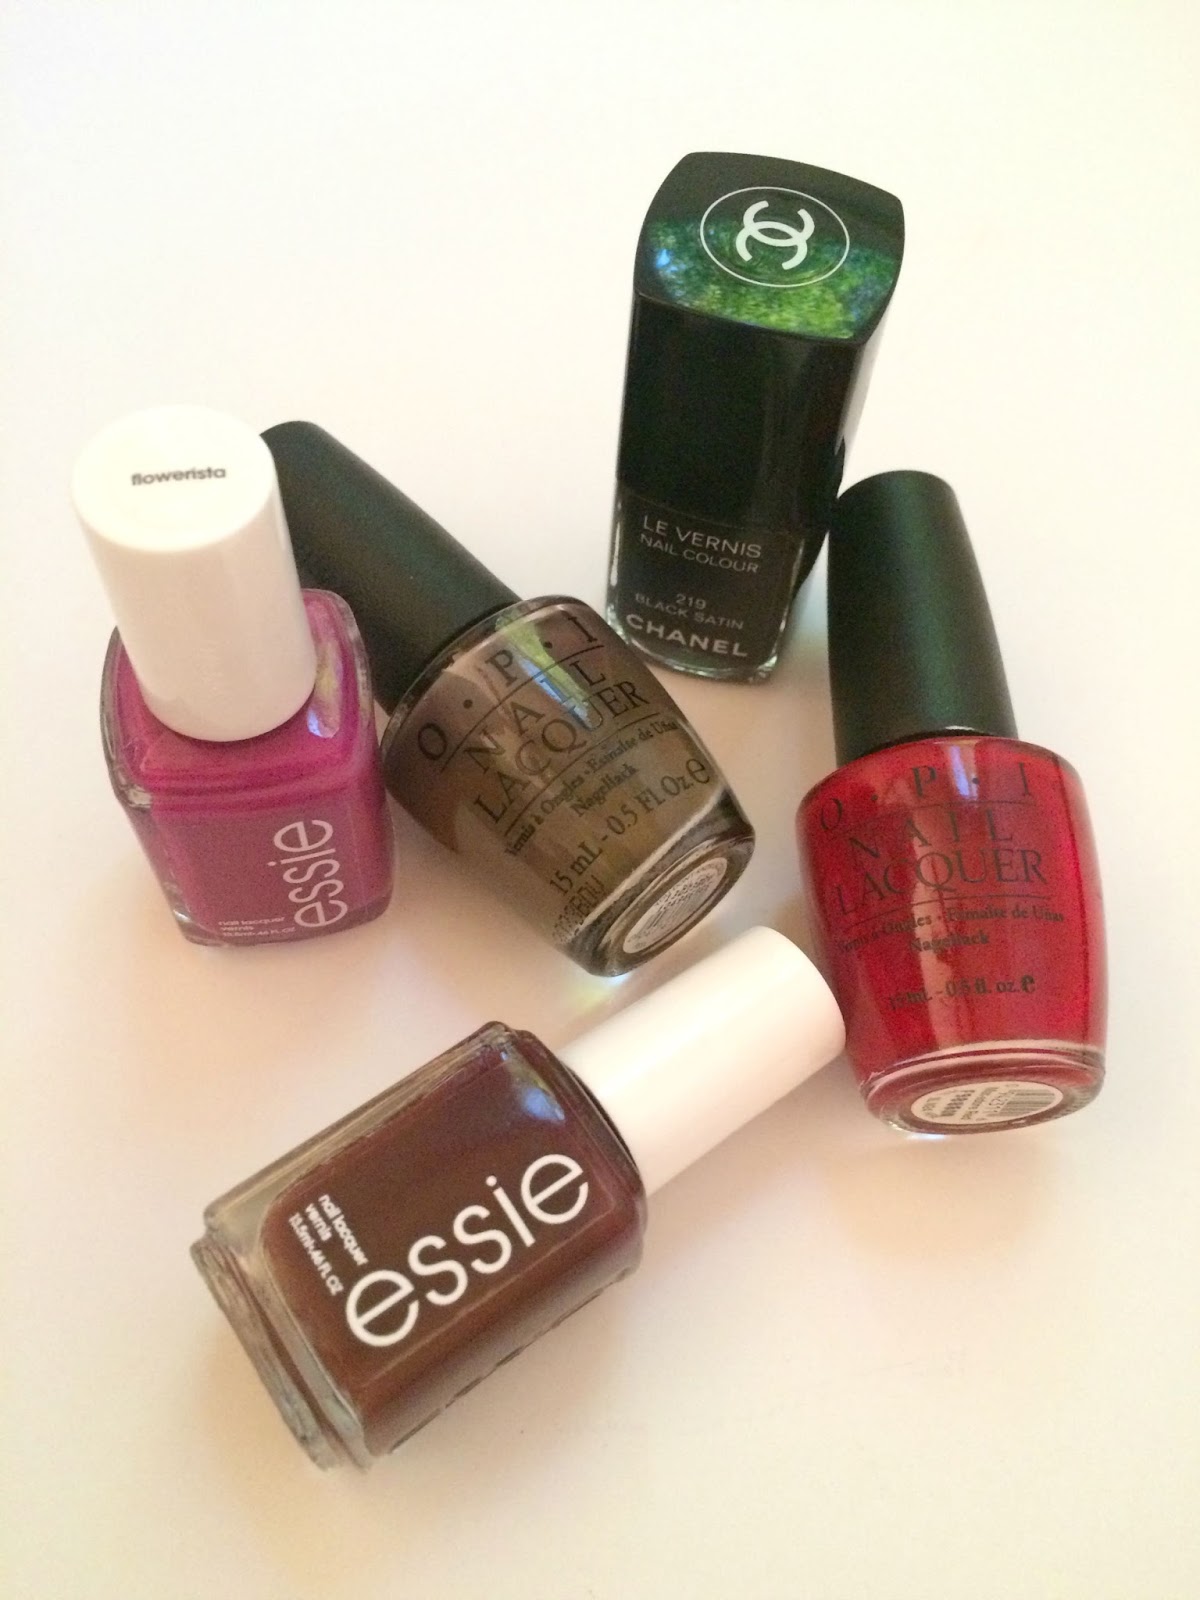
ail color is another great way to transition your makeup. My favorite fall color, although I do wear it all year round, is OPI's "You Don't Know Jaques". But I also love dark reds and black!
 Essie "Flowerista"/OPI "You Don't Know Jaques"/Chanel "Black Satin"/OPI "Mat-adore Red"/
Essie "Shearling Darling"

 Lastly, it's all about the eyes! I love dark browns and olive tones. Mixed with black liner and several coats of mascara, all eyes will be on you! 


 Laura Geller Beauty Creme Glaze Trio in Golden Set/Chanel Les 4 Ombres Tentation Cuivree/
MAC 6 Devil May Dare Warm Eye Shadows


What is your favorite way to transition your beauty from summer to fall? Do you go with richer colors in deep shades or do you continue to use brights all year long? Let's discuss!

Happy Friday, Beauties!

Friday, July 31, 2015

Friday Beauty - After Sun Products

As most of you know, I just came back from a week at the beach and I took full advantage of that time! I soaked up the sun as much as I could and I was rocking the best tan! One of my best since my life guarding days so that's saying a lot! I was safe about it too. I wore sunscreen with 30 SPF, sat under our canopy when I needed a breather, and reapplied sunscreen when needed. And for those who really know me, know this is very uncharacteristic of me! 

But with all of that, I did over-indulge one day. I still wore sunscreen, and sat under the canopy when needed, but on this particular day I wore a suit that was cut much differently than the ones I had been wearing. Fresh skin was exposed and it seemed no amount of sunscreen was going to help! By late afternoon, I was sporting a slight burn in those areas that hadn't seen sun in a very long time. What did I do post sun exposure? I applied my product to help soothe the burn. 

I love the Banana Boat after sun lotion. I've been using it for years. The lotion is thick, soothing, smells amazing, and really helps extend your tan. On the other hand, the aloe vera gel is something that I use when the burn really needs a cooling agent. This burn wasn't that bad, but had I known my mom had this with her, I would have definitely applied immediately.

  
So what do you do when you don't have these products at your finger tips or under your bathroom sink? Look no further than your kitchen. Have a bottle of white vinegar in your cabinet? Then you have a sunburn soothing product on your hands! Simply apply with cotton balls to the over-exposed area and it will sooth the burn. It stinks, but it works! What do you think about that? I would say that's a pretty good beauty and kitchen hack, no?


What do you do when you get a sunburn? Please share! Everyone needs a little summer sun product advice. Including this beauty blogger!

Happy Friday, Beauties!

Friday, July 17, 2015

Friday Beauty - Travel Toiletries

When packing for a trip, I am not one to take a ton of toiletries. I like to try and pack as light as possible. And I don't pack a large cosmetics bag. It's the bare essentials. So when packing up my toiletries, I hit the travel aisle at my drugstore! It's a great place to get smaller versions of your everyday products and an awesome way to test new products. And sometimes you find surprise products like dry shampoo! I was so excited to find a travel can! And aren't those tiny loofahs the best! Here are some of the ones I'm taking along.


I also hang on to all of my samples from Clinique Bonus time! That's the best time to hoard all of your favorites in mini versions! And, you get cute little cosmetic bags to boot! That brings me to another packing point. Don't take all of your cosmetics. Bring along your daily essentials, and a few select tools, but stick to one eyeshadow pallete, one liner, and your mascara. No need to bring it all!

I pack all of my stuff in clear plastic bags. Mine came as part of a Mary Kay travel kit and I love them. If something spills, you simply wipe it out and move on. Definitely something to think about investing in, if you don't have something similar already. 

Happy Friday, Travel Beauties!!

Tuesday, June 30, 2015

My DIY - July Fourth Nail Art

I'm not sure if nail art is still on trend, but I still like it! And, I like to dabble in it. But I'm not very good. They say practice makes perfect, but I don't have a whole of time on my hands....pun intended! So I drew some inspiration from Pinterest and decided to give a couple of cute nail art styles a try. 

Here is what I used:


For the first round, I used OPI Red, Essie Blanc, Essie Butler Please, and Revlon Night and Degas. I painted the majority of my nails red, using my ring and thumb as my accent nails. Those, as you can see, I painted with Blanc. I used the Revlon Night and Degas to create the stripes and totally went free hand. If you want a more professional look, tape off the stripes and paint. Just like you would a wall. I dotted the white accent nails with Butler Please and OPI Red. And that's it. Super simple and kind of cute, no?


For the second round, the only color I didn't use was the Revlon polish. But, I added Nicole by OPI  Rainbow in the S-Kylie. (I think this might have been from the Kardashian Collection.) I randomly polished nails in the red, white and blue polish, and went back over them with the glitter. I love how it gave them a little firecracker look! Or sparklers. I love those things!


 And last year, I did this cute design. A little here and a little there. A fun pattern that was totally whimsical!

My fun Fourth of July nail art! http://akstylemyway.blogspot.com/

With the fourth fastly approaching, would you give these nail art designs a try? If you have already, please share! I love to get inspiration from others!

Here's to the old Red, White, and Blue!

Friday, April 17, 2015

Friday Beauty - Some New Favs


I recently browsed the beauty aisles of Target looking for a few things for a trip we took last week. My initial search was for a waterproof mascara, something I don't ever wear, but needed. As you know, I'm not a fan of the Maybelline Great Lash, so I headed to Cover Girl to see what they had to offer. I decided to go with Lash Blast Volume. Based on the packaging, the "mascara formula and patent-pending brush are designed to max out each and every lash, leaving you with the ultimate big-lash look." That's what I'm looking for in a mascara so I decided to go for it. I loved it! It gave me a big lash, didn't clump, and went on with full coverage. Nothing like the Maybelline mascara. I loved it so much I bought the non-waterproof as well. It's my new daily mascara! 

Beauty Note: Because waterproof mascaras are just that, I find them hard to remove with makeup removers. This mascara wasn't any different. Because we were on the road, I used Neutrogena makeup remover towlettes. I bought the travel size packs since they lay flat! It took off some, but I still felt like I had a layer on my lashes.


Whenever I travel, I like to have nice nails. Clipped, filed, and with some sort of polish. I usually get a gel manicure. That indestructible mani is the best! However, I'm on a budget and I'm not allowing myself trips to the nail salon. I remembered seeing an ad or commercial for the new Sally Hansen Miracle Gel polish that states it works as well a gel mani without the light. I'm always game for trying new products, and since I needed a hefty polish, I gave it a go. I went with Birthday Suit, I wanted a more natural nail color, and the recommended top coat. I loved the color! It's a very pale peach and totally neutral. It lasted six days, claims to last 14, and it would have lasted long if I hadn't decided to go for a different shade! I'm obsessed! I bought Pink Tank and Blacky O. I'm currently wearing Pink Tank and it's so cheerful! (Check Instagram later for look at the polish!)

Beauty Note: When applying Birthday Suit, I needed three coats to achieve the color I wanted. Apply more or less for the color you desire. Also, I would recommend buying the Step Two Top Coat. It's intended to go with the polish to give you that gel mani look.


I am so happy with my new drugstore finds! I'm psyched about my new mascara! I've been on the hunt for a few months, and I think I've found the one. The new "gel" mani is great! My tiny investment in a few colors, and one top coat, will last me all spring and summer. I will probably add a color here and there, but it's so much more economical than a visit to the salon.

Any new products that you're currently using and loving? Share them with us! I'm always looking for something new and reader recommendations are the best! 

Happy Friday, Beauties!

Friday, March 20, 2015

Friday Beauty - Rouge Coco

 What can I say about the House of Chanel. The clothing, her style, the cosmetics line....all enviable! I've worn Chanel cosmetics for years! I love their eyeshadow quads, I own more than I care to mention, and I'm a huge fan of their lipsticks. About a month ago, I stopped by their counter and chatted with my favorite makeup artist, Madeline. (If you get a chance, swing by the Halls Chanel counter and set up an appointment with her. She's amazing!) She told me about the re-launch of the Rouge Coco lipstick line and I couldn't wait to test it. 


 Not only is the formula new and improved, the reinvented version of Rouge Coco is more expressive than ever with a new formula and vibrant color spectrum, the names are all new. Well, new to us. The colors are broken into five categories; Artists, Lovers, Friends, Muses, and Family. And, to take it one step further, they are all named after someone in every category! How great is that! You must have been someone incredibly important to get a color named after you! I recently tested Jean and brought her home! I love the new formula and the color is perfect for spring! A berry, that leans more toward purple, that feels so luxurious on your lips! I just want to know who Jean was. According to the chart, she (or he) was an artist. Their influence must have been epic!


Have you tried Chanel's cosmetic line? If so, is their lipstick on your list of products you currently use? If not, head to your local Chanel counter, or ask for Madeline when visiting Halls. It might be a little on the pricey side, but it's totally worth the spend! A lipstick that will last and a friend for life!

Happy Friday, Beauties!

Friday, March 13, 2015

Friday Beauty - No Dry Time Nails

I love to do my nails. I love getting manicures and I really enjoy doing them myself as well. I've loved experimenting with nail art, but it hasn't been too extensive in design. But the thing about doing your nails is that you have to wait for them to dry. And I mean wait. Like a couple of hours and who has time for that?!? If and when I actually do my nails, I paint them at night after everyone has gone to bed. I'll paint them, work on the blog, watch a little TV, and then I'm off to bed. Usually by then they're dry. 

Then there was the invention of the gel polish. I love getting a gel manicure! It lasts for about two weeks, is instantly dry, and you can be as rough as you need to be without a worry of chipping the polish. The down side to the gel mani is that you have to go back into the salon to get it removed. Sure, you can do it at home, but the process is long and it really dries out your cuticles. And, if you're like me, you usually just peel it off which is horrible for your actual nail bed. Oh, and you have to pay roughly $25 a visit for application. Mani's aren't cheap!

The best solution of all was the creation of the nail polish strips! They are an absolute dream come true! I've been using them for a couple of years and I've tried most the brands on the market. I love Sally Hansen's Nail Effects. They are really easy to apply, come in various colors and nail art creations, and the obvious no dry time is the ultimate reason to love! The little box comes with everything you need. The nail strips, cuticle pusher, and instructions for application. I love an all-in-one beauty buy! The Maybelline nail strips work pretty much the same way, however you file off the excess instead of peel like the Sally Hansen version. It doesn't come with anything but the strips and instructions.

 
Then Jamberry entered my life. Jamberry are Nail Wraps that are made of high-quality vinyl. They are long lasting and they are applied with heat and pressure--no chemicals, no odors, no smudging, no dry-time! The wraps can last one to two weeks on fingers, and up to six weeks on toes! They are latex-free, cruelty-free (never tested on animals) non-toxic, and gentle on your nails! For anyone who is leery of harsh chemicals around children, this is the product of you.

I started using Jamberry after my aunt held a Facebook party about a month ago. I love the catalog of nail wraps, which is quite impressive! And the online parties are so much fun. There are daily games, prizes to win, and a huge door prize at the end of the party which my mom won during Mandy's party! The application is a little more difficult than the previously mentioned products, but there are tons of YouTube instructional videos to assist you. Because they are heat activated, you need a hair dryer, but Jamberry does offer a cute little heater for purchase. You also need a cuticle pusher, manicure scissors to cut off the excess, and a nail file to file off the ends. I haven't quite gotten the knack of applying them, but I'm slowly getting the hang of it. I still highly recommend them because they do live up to their guaranteed longevity. Honestly, this is the way to go in the world of manicures.


Have you tried any of these nail wraps/strip products? If so, which ones? Any not listed? Tell us about them. Which is your absolute favorite? 

Happy Friday, Beauties!

Friday, March 6, 2015

Friday Beauty - Dry Shampoo

This is going to sound so gross, but I don't wash my hair every day. And, I may or may not wash my hair every couple of days. To be honest, because I have naturally curly hair, the experts say that it's not good for us to actually wash our hair on a daily basis. We have drier hair than most other textures so we need all that oil to keep it healthy. So, if on the fourth day I finally wash my hair, I feel like I'm doing it a favor! I blame the "experts".

So what do I do to combat the oil on the second and third day, dry shampoo! It is the best invention ever!! It really does soak up the existing oil without drying out your hair. And I've found that when I straighten my hair, it's actually fuller after using dry shampoo. They even make dry shampoo specific for curly hair! I get the best of both worlds!!

I've been using dry shampoo for years, I've even converted my mom, and I've tried a ton! Expensive, non-expensive, and name brand, off brand. And I have to say that the non-expensive work just as well as the expensive! Not shocking, huh? So I've compiled my existing brands and sharing them with you.


Blowpro was an item in a gift bag that I had all but forgotten about. When I tried it, a huge clump of powder proceeded to fall out of the bottle. I wasn't expecting that at all! If I were going to simply use powder, I would reach for the Johnson's Baby Powder. The original dry shampoo! Seriously, if you are in a pinch, or don't want to buy any, just use baby powder! Just be careful when using it. Because it's a powder, it will definitely be visible on any dark clothing you're wearing! And if you're a brunette, you have to be super careful because you'll look like George Washington. Blondes are so lucky!

The L'Oreal can was empty so clearly I liked it. Not sure if I thought I could spritz one last blast or what, but lucky for me I had it for the photo. I didn't leave a white residue and worked well. I don't use the TRESemme for curly very often. It's a mousse consistency so you have to watch the amount you use. Start small and add as needed. My favorite so far is the Suave! It's super inexpensive, works really well, adds tons of volume, and smells like grapefruit. It doesn't linger, but it's a nice, light scent for the remainder of the day. And no residue once you've brushed it through your hair. It's a great bang for your buck!

While we're on the topic of not washing your hair, I'm not washing mine again today! That's day two and I'm relying on Suave to get me through! (I didn't need it yesterday since I washed it so late the day before.) We're running late today and I just don't have the time. Thank goodness for dry shampoo!

Happy Friday, Beauties!

Friday, February 27, 2015

Friday Beauty - Clinique Cleansing Brush


It was a happy Valentine's Day earlier in the month when I received my own Clinique Sonic System Purifying Cleansing Brush! My mom gave me this amazing gift and I've fallen victim to its awesomeness! If you haven't jumped on the cleansing brush bandwagon, now is the time to do it!

I started using the brush immediately, I'm on week two or so, and I've seen such a difference. And I feel a difference too. I told my mom after the first use that I honestly felt like my skin was already soft. I told her thought I was crazy for thinking that after one use, but she confirmed I wasn't. She has been using hers since January and she felt the same result. The Cleansing Brush is a dermatologist-developed sonic brush that offers deep yet gentle cleansing for skin. In one cleaning, it sloughs off all the dead skin. And the two bristle types target cleansing in hard-to-reach, contoured areas of the face where dirt hides, as well as an angled tip that purifies pores and thoroughly cleanses your T-zone.

The brush is waterproof so it's great for the shower! You simply apply either the liquid face soap or the foaming sonic facial soap, in a small amount, and let the bristles do all the work! The bristles are not rough on the skin, but you do need to follow the recommendation first time use. 


After that, you follow up with the 3-Step program designed for you. 


I can say that I've had a few breakouts but nothing horrible. They were in my T-Zone so clearly the brush is working! I'm not kidding when I say to take the plunge, make the splurge, and get yourself a cleansing brush! You won't regret it. Your skin will thank you. And, it will be the best investment you make this calendar year!! 

Happy Friday, Beauties!

Friday, February 20, 2015

Friday Beauty - A Cold

I am currently suffering from either a really bad cold or a horrible sinus infection, but I just can't seem to find time to go see the doctor. Maybe next week. So instead of a beauty post, which I'm feeling nothing of the sort, I'm just going to provide you with the items I'm using while trying to survive this week! 


What are your go-tos when feeling sick and tired? Here's hoping I'm on the mend by next week!

Happy Friday, Beauties! Have a wonderful weekend and stay warm!

Friday, February 6, 2015

Friday Beauty - A Smokey Eye

 Over the weekend I attempted my first smokey eye. I've read about how to apply them over and over and over again, yet I've always been so fearful of trying. That is until I purchased the Clinique All About Shadow Quad in Smoke and Mirrors. It literally has a step by step guide on the mirror and corresponding numbers on the shadow liner. They even number the sponge applicators that are included. Now, I'm not an applicator kind of girl. I use brushes and have for years. I feel the shadows go on a lot smoother and it's easier to apply more or less color when needed or desired. In my opinion, the sponge applicators just seem to soak up the shadow. 

In the first photo, you will see all the tools I used (they are what I use on a daily basis), and I will touch on how I used them during the application process. This really is the easiest smokey eye you can ever do!


I have my quad, all of my brushes, my concealer, my MAC paint, mascara, and Clinique primer. Did you know that Clinique made a primer? Me either and more on that in a different post.
 
First up, I always, always, always use a primer on my lids. ALWAYS! It just highlights the shadow and doesn't allow it to settle into the crease after a full day of wear. Honestly, if you aren't using one today, you should be! I swear by the MAC paints.


Here's the quad and your step by step guide. Just apply the shadow where the diagram indicates. So easy!!


Apply the highlight color to just below the brow bone and just to the top of your crease. I used a flat wide brush when applying my highlighter.


For step number two, use a fluffier tipped brush to really get in the crease. One important tip, wherever you apply the shadow is where it will be its heaviest. I try to shoot for just off the corner of the crease and blend out and in from there. If you're using the sponge applicator, go light at first and add more as needed!!


Use the same brush for step number 3 and start applying from the inside corner of the crease and blend toward the center.


Once you have applied both steps 2 and 3, go back in with a fluffy blending brush to combine. You don't want to see definitive lines from where you started and stopped both shadows. Work in a circular motion while blending.


Step four is the eyeliner shadow. I love a shadow liner and I've used one for as long as I can remember. You have complete control over how much, or how little, you use at one time. And, it goes on so much easier than an eyeliner stick. Use a small angle brush to apply. (If you are using the applicator, apply using just the tip.)


I load up the brush and start from the dead center of my eye and work my way to the outer corner. I work with tiny brush strokes as I go. Almost like I'm connecting dots. Reload the brush with more shadow as needed. Once I have the line I want, I reload my brush and then start from the inner corner of my and apply to the middle.


For a smokey eye, line both the top and bottom lash lines. For the bottom, I start at the outer corner, staying as close to the lash line as I possibly can, and go to just past the center of my eye. Blend, blend blend! You don't want to see your bottom lash line liner!

Then load up your lashes with your fav mascara. I've been using Maybelline Great Lash for about a month, not a fan, so for this look I went with Clinique's High Impact Mascara. A new mascara, a sample provided by Clinique, that I'm currently testing. 

I am one who hates to see spider eyes, think Tammy Faye Baker, so I go back in with a mascara brush to smooth out any clumps that have formed. Plus, I try to make them as full as possible.


 And here is the final look!


When going with a heavy eye, keep everything else light. I went for a very light, sheer blush, and nude lip. You want only one thing to shine in this look and that's the eye! For my cheeks, I used Stila Convertible Color in Lillium. For my lips, I used Chanel lipstick Rouge Coco in Sycomore and gloss #237.

What do you think of a smokey eye? As intimidating as you thought it would be, or easy as pie with the help of this Clinique quad? Other brands that offer this kind of shadow are L'Oreal, Maybelline, and Revlon. Great drugstore brands that won't break the bank! 

I can't wait to hear your stories! Share them with all of us!

Happy Friday, Beauties!

Tuesday, July 15, 2014

DIY Nail Art - Baseball Inspired Pedi


As most of you know, and for those of you who don't, I am a huge baseball fan and I am serious Kansas City Royals fan! We moved to Kansas in 1982 and started attending games during the summer of 1983. We cheered the Royals to victory during the 1985 World Series, and even after we moved away for numerous years, we remained die hard fans. I've been back in Kansas City for seventeen years and continue to head to The K as often as I can.

So when I was approached by Julep to participate in their "summer DIY pedi competition", I didn't have to hesitate with my answer. I am a fool for contests, I love to paint my nails, I'm totally into nail art, and I'm all about saving some money these days by doing my own. With so many amazing products on the market, you don't need a nail tech. You just need these awesome tips from Julep, a steady hand, and plenty of time to create! Also, check out their newest nail polish color page!!

 This past weekend, we attended a Sunday afternoon game, and since my toes needed a fresh coat of paint, I decided to go for a baseball theme. The Royals logo above was my inspiration, and since the All Star game takes place tonight, it's only appropriate that I post this DIY tutorial today! Below are the colors I used:

Base/Top Coat: Sally Hansen
OPI: OPI Red
Essie: Butler Please
Revlon: Night and Degas
My own paintbrush

You will also need nail polish remover and something to clean your brush with like a cotton ball or piece of tissue. Remember this post?


I painted all of my toes with Butler Please, which is the perfect royal blue. And I love that it's Butler Please. We really need Billy Butler to step up to the plate in the coming weeks....PLEASE! 


Obviously the next step is to let them dry! Once that's done, I needed something to help me outline a circle for the baseball. I originally thought of using a piece of three ring binder paper. That circle would have been perfect. Or the reinforcer we used to use when that piece of paper ripped. Please tell me you remember those? Then I found this awesome stencil.

I made sure the circle was centered on my toe and then....


 I used the Degas white and put just enough color on the brush to help make the outline of the circle. And don't worry if your circle isn't perfect. You can go back in and clean up the lines with the Butler Please and your thin paintbrush. Trust me, I did just that with this one!


 While I let the circle dry, I moved over to the other foot and worked out the design for the KC. Let me tell you, creating the letters backward was tough! But, I thought they turned out pretty well. Again, I used the Revlon Degas, the thin brush is perfect for this kind of project, and simply took my time. And, once I had the letter down, I really tried not to go back in and mess with it. That can just make it worse.


Whenever I think of the letters K and C, I'm always reminded of the line from FRIENDS where Ross is taking a message for Rachel. "Is that like Casey at the bat or and the Sunshine Band?" Again, another baseball reference...


So while the KC and circle continued to dry, I just started designing each toe with a different pattern. I went with polka dots, chevron stripes, and stripes that were horizontal and vertical. And once the circle was dry, I went in on the stitches of the baseball. Those were a lot harder than I expected! Again, I made a few minor mistakes, but was able to easily clean them up with the tiny brush in the Revlon bottle.  

Instead of using the giant brush that came with the OPI bottle, I went for the very thin paintbrush. And I used tiny amounts of polish as I didn't want it to run or drip all over everything I had done so far. And again, take your time. Be patient and try not to go back over it too many times. 


And there you have it! The finished product post game. And my post game relaxation, while my son napped and my husband mowed, was putting my feet up, drinking an iced cafe mocha, and diving into my new Danielle Steel novel! It was a prefect end to a perfect Sunday afternoon.


What do you think of my DIY pedi? I am so happy with how it turned out. I'm having such a great time with this competition, and I'm already scheming on my next nail art creation. Stay tuned! I can't wait to show you what I've done and how you too can create it at home!

And in the words of my son, "Royals, clap clap. Royals, clap clap!" A die hard fan at three. I love it!