As I mentioned in yesterday's post, I'm really trying to change things up on the blog and add some additional content. I love DIY projects, whether it's fashion or home interior, and I want to try and integrate it again.
Over the holidays, when Hallmark Channel was once again available on U-Verse, I found myself sucked into all the holiday movies. And one morning, while McKinley was in school, I flipped over to find a sweet talk show called Home and Family. I was immediately hooked! I loved everything about the show and found myself drawn to Orly Shani and all of her amazing DIY fashion.
If I couldn't watch the show, I would watch the first five minutes to see if she was going to be on that mornings episode, and record it if she was. I didn't want to miss a minute of what she might be creating. And here we are in March, and I'm still watching and learning from everyone involved. Side note; I love Debbie Matenopoulos as well!
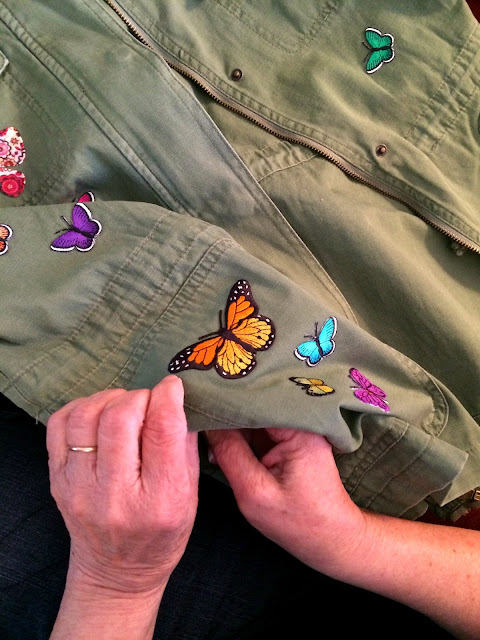
So just last week, Orly had these amazing embroidered jackets with beautiful floral designs and the most colorful butterflies. It turns out, Valentino created an embroidered butterfly camo jacket that I'm sure retails for thousands of dollars! Orly recreated one, using a vintage camo jacket, with butterfly applique iron-ons! Brilliant! I can totally do that. And I did!
Here's what you'll need:
A Camo Jacket (I used a Field Jacket)
Butterfly Iron-Ons in various sizes and colors that compliment
An Iron
An Ironing Board
Needle and Thread (optional)
So here is my field jacket and some of the butterflies I chose. I went with large ones and small ones to create balance throughout the jacket.
From there, I placed butterflies all over the jacket, in random patterns, mixing the large and small with colors that complimented one another.
After I created the pattern I wanted, I went back and pinned all the butterflies into place. You don't want to lose them all when you pick it up to move it to the ironing board. (You could create your design on the ironing board, but I went the hard route I guess....)
Then it was time to start ironing. Make sure you follow the simple instructions on the back of the applique. It's super simple. Just heat a dry iron to the hottest setting, place a thin towel between the applique and iron, and press down for about 10-15 seconds. If you aren't sure of the applique is sticking, simple lift a small corner to test. If it's not, continue to run the iron over the applique. After it's adhered to the fabric, turn the jacket over and iron it from the underside. Do the same thing you did to the front of the jacket. Do this for each individual butterfly.
Ironing Tip: Make sure to remove the pin before you run the iron over the applique.
Once all butterflies, or appliques, have been ironed into place, you may want to go back and tack down the corners to ensure they don't pull away. This last step is completely optional, but since I added a few to the shoulder, I thought my handbag might rub and cause the corners to pull away. I had my mom help, we took turns stitching butterflies, and we tacked down each corner with two stitches per corner. And we've decided, if anything does start to pull over time, we will simply use fabric glue to re-adhere.
This is one of the cutest things I've recreated in a long time and I can't wait to style it!! And, I can't wait to hear your thoughts. Will this be something you will try to make? Would you use different iron-on appliques?


No comments:
Post a Comment